背景
Rhino.Inside.Revit 1 已经上市,我们也准备了配套的使用手册,为了方便中文用户,我们会陆续将使用手册本地化,这是 Rhino.Inside®.Revit 手册中文版 的第4个部分 - Python 脚本,
请注意:
- 建议阅读本手册之前建议至这里了解 Rhino.Inside®.Revit入门指南

- 这是一套偏向教学本地化手册,既可以系统的学习 RIR也可以针性搜索查询某个功能;
- Rhino.Inside®.Revit 必备内容请浏览 Rhino.Inside®.Revit 中文手册1 - 必备内容
- 如何利用 Rhino.Inside.Revit 建模?请浏览 Rhino.Inside®.Revit 中文手册2 - 建模
- 关于 Revit的文档、容器与设置请浏览 Rhino.Inside®.Revit中文手册3 - 文档/容器/设置
- Rhino.Inside®.Revit 是一个继续开发中的项目,手册内容也会随着开发持续更新 ;
- Rhino.Inside®.Revit 手册英文版-请浏览这里

Revit 中的 Python 组件
Grasshopper 中有三个脚本组件,分别对应 Python(目前只支持IronPython)、VB.NET 和 C# 三种语言,用户可以通过这三个脚本组件编写自己的计算逻辑,这三个组件都可以定义输入和输出接口的数量。

由于 Rhino.Inside.Revit 将 Rhino 和 Grasshopper 引入到 Autodesk Revit® 环境中,因此这些脚本组件也可以调用 Revit API 的运行时,在这篇文章中,我们将讨论使用 Python 脚本来为 Revit 创建自定义组件。
设置
在 Grasshopper 画布上添加一个 python 组件以后,您能够看到一些默认的导入包:
"""Provides a scripting component.
    Inputs:
        x: The x script variable
        y: The y script variable
    Output:
        a: The a output variable"""

import rhinoscriptsyntax as rs
如果要调用其他的一些 API,就需要先把这些包导入到脚本中来,要调用 Revit 和 {{ site.terms.rir }} 我们还需要先导入 CLR (通用语言运行时)模块和其他一些必要的模块:
# Common-Language-Runtime module provided by IronPython
import clr

# add reference to base system types e.g. Enum
clr.AddReference('System.Core')

# add reference to API provided by Rhino.Inside.Revit
clr.AddReference('RhinoInside.Revit')

# add reference to Revit API (two DLLs)
clr.AddReference('RevitAPI')
clr.AddReference('RevitAPIUI')
现在就可以在脚本中导入这些命名空间了:
# from System.Core DLL
from System import Enum, Action

# Rhino.Inside.Revit API
import RhinoInside
from RhinoInside.Revit import Revit, Convert

# add extensions methods as well
# this allows calling .ToXXX() convertor methods on Revit objects
clr.ImportExtensions(Convert.Geometry)

# Revit API
from Autodesk.Revit import DB
from Autodesk.Revit import UI
自定义组件
每当新建一个 python 组件的时候,都要重新导入所需要的模块,如果您觉得太麻烦,可以把您经常使用的模块设置到一个导入模板并保存在 Grasshopper 的 用户组件 中:
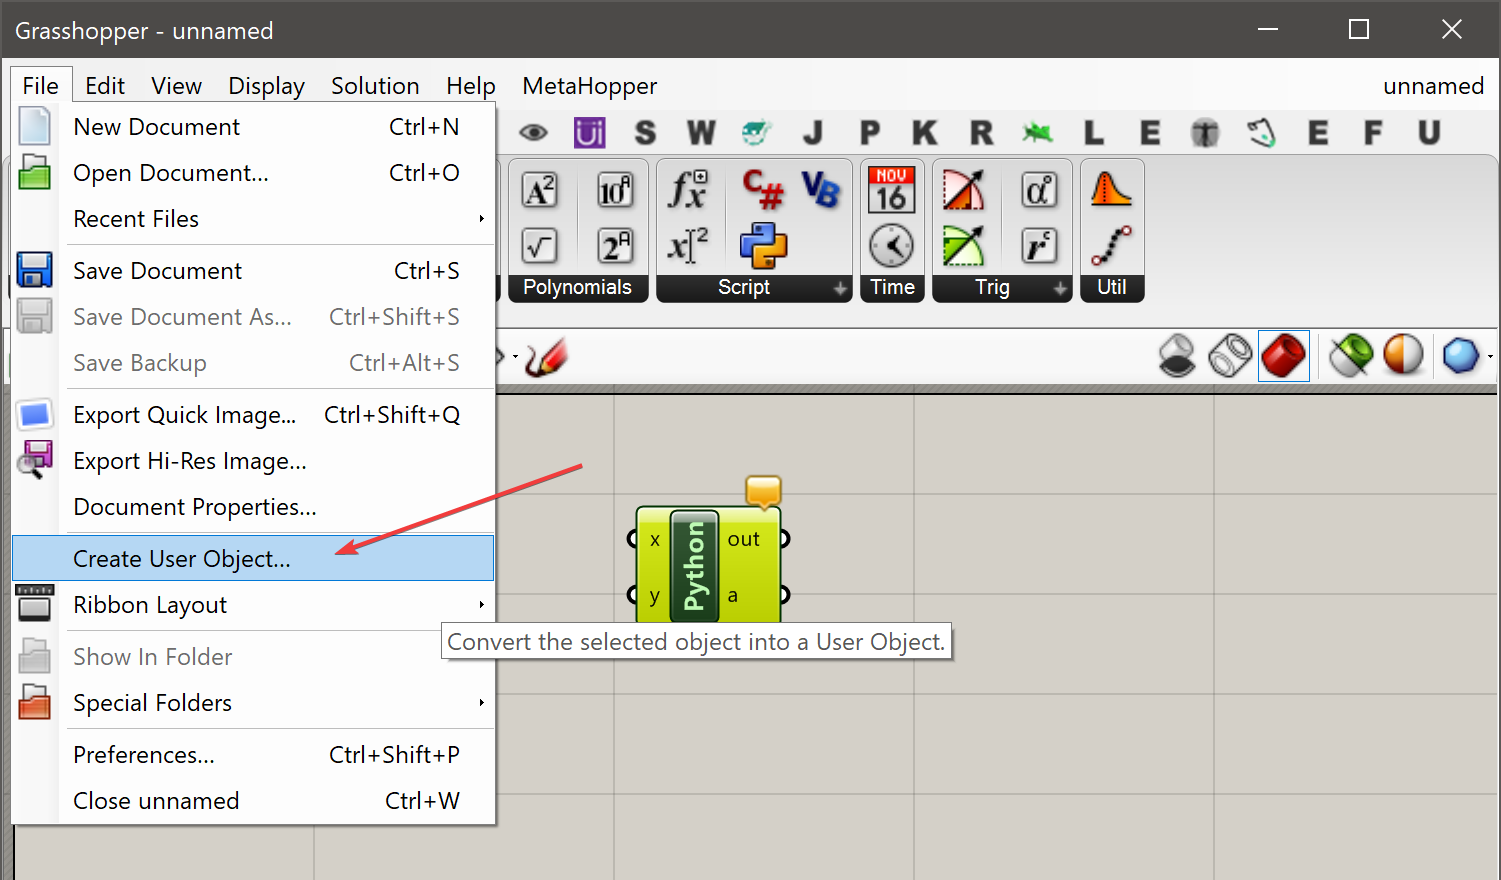
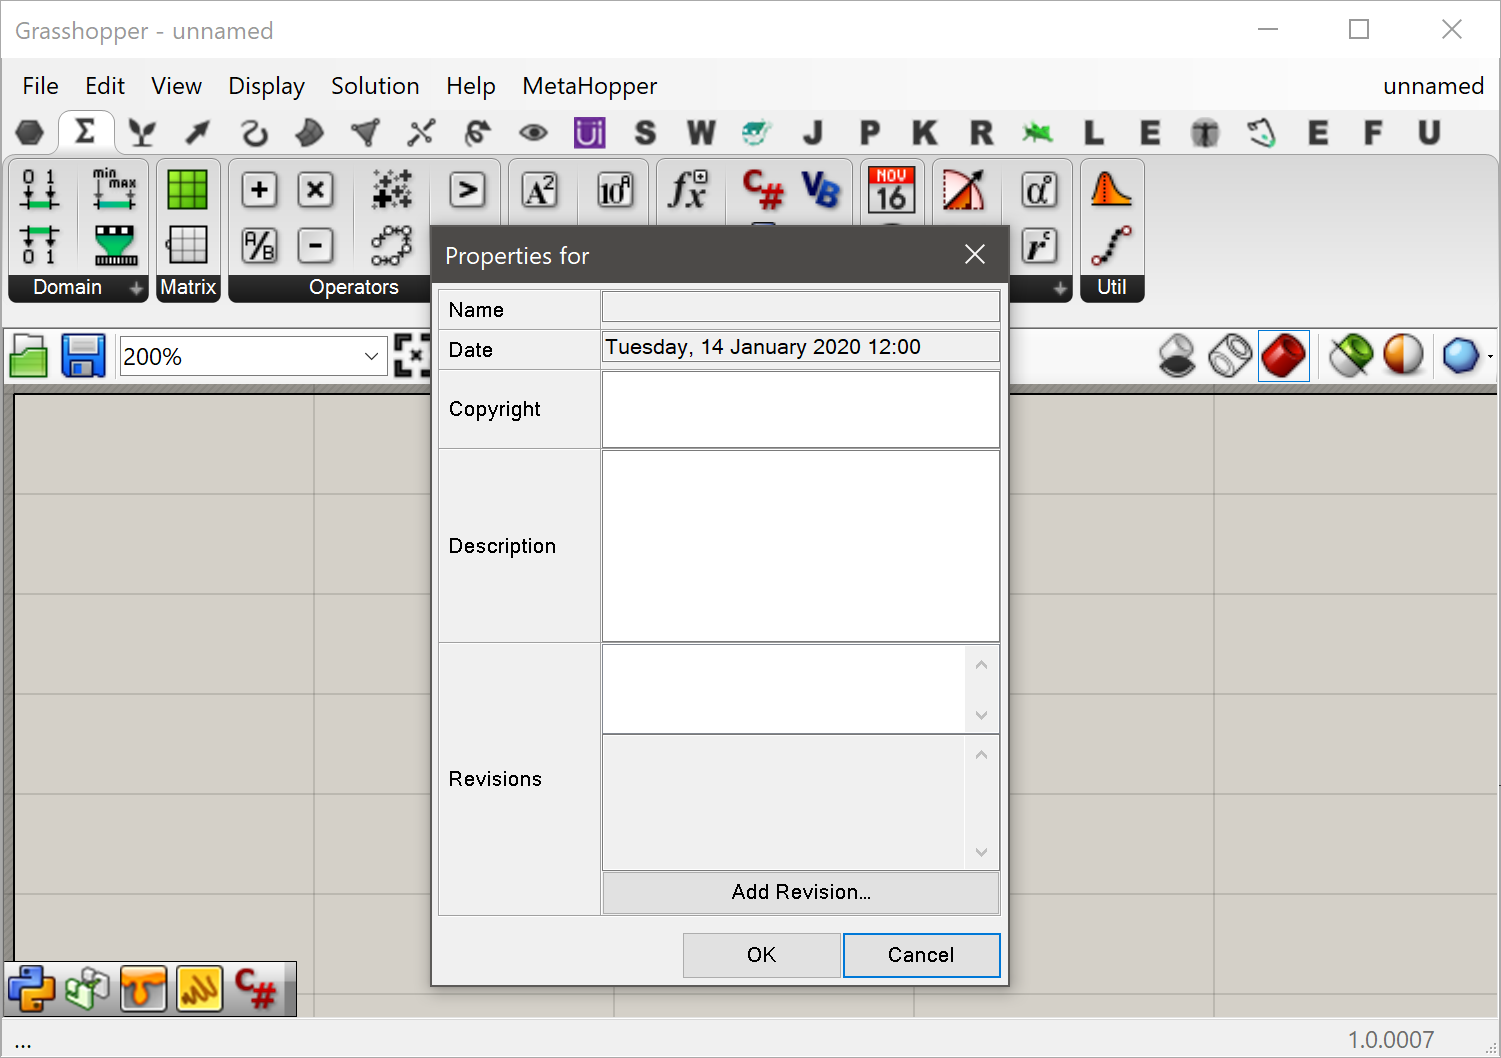
创建用户对象以后,您可以很容易从用户对象中创建一个新的 Python 组件,打开以后,它的 Python 脚本中就已经包含了您设置到模板的所有模块了。
下面的这个脚本模板适用于大部分情况:
import clr
clr.AddReference('System.Core')
clr.AddReference('RhinoInside.Revit')
clr.AddReference('RevitAPI')
clr.AddReference('RevitAPIUI')

from System import Enum, Action

import rhinoscriptsyntax as rs
import Rhino
import RhinoInside
import Grasshopper
from Grasshopper.Kernel import GH_RuntimeMessageLevel as RML
from RhinoInside.Revit import Revit, Convert
# add extensions methods as well
# this allows calling .ToXXX() convertor methods on Revit objects
clr.ImportExtensions(Convert.Geometry)
from Autodesk.Revit import DB

# access to Revit as host
REVIT_VERSION = Revit.ActiveUIApplication.Application.VersionNumber
# access the active document object
doc = Revit.ActiveDBDocument

# a few utility methods
def show_warning(msg):
    ghenv.Component.AddRuntimeMessage(RML.Warning, msg)

def show_error(msg):
    ghenv.Component.AddRuntimeMessage(RML.Error, msg)

def show_remark(msg):
    ghenv.Component.AddRuntimeMessage(RML.Remark, msg)

# write your code here
# ...
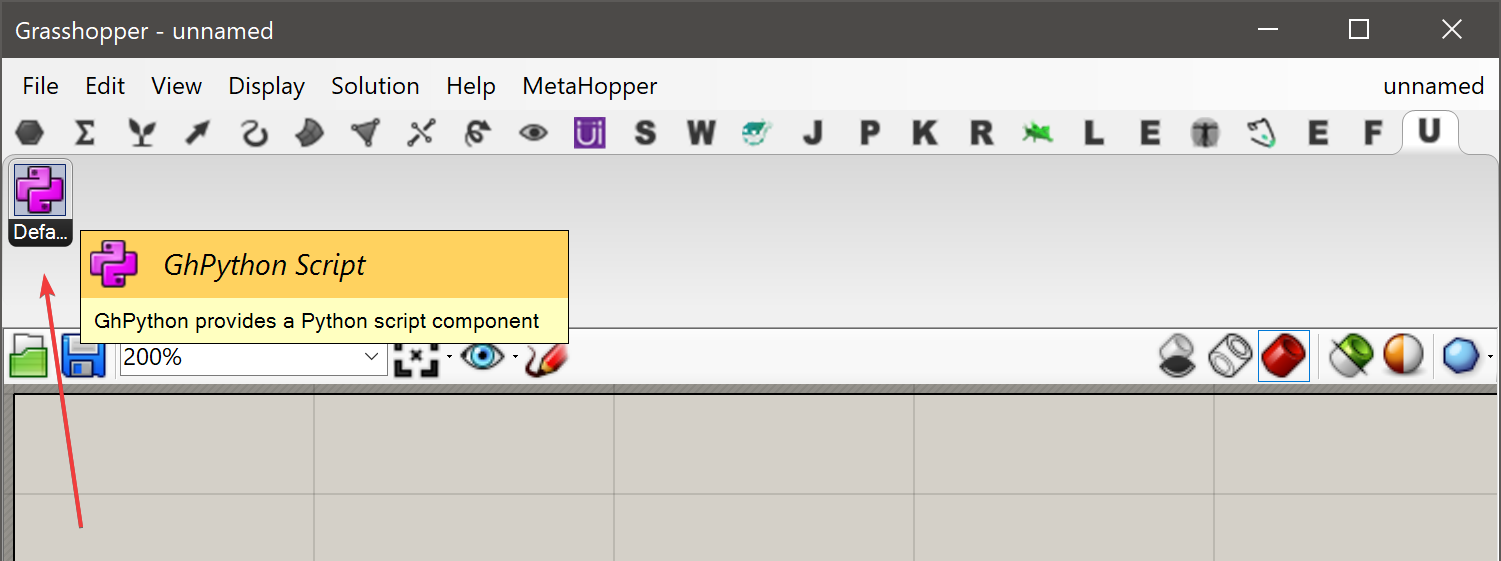
点击这个按钮可以下载包含这个模板的用户对象:
![]()
放到 Grasshopper 的 User Objects 目录中,可以在 Revit > Custom 面板中找到
范例
这个范例演示了在 Revit 和 Rhino 中创建一个可以调整半径的球体。通过输出端可以将这个球体传递给其他 Grashopper 组件,按下连接到输入端的按钮,就可以在 Revit 中创建球体并 Bake 到 Rhino 中。

正如上图所示,我们重新命名了输入组件,也重新命名了 python 组件上的输入和输出端口上的参数名称,它使得定义更加清晰,这对刚开始使用这个组件的用户来说非常的友好。
准备工作做好以后,就可以继续创建脚本了。
创建球形几何体
我们使用下面的脚本演示在Grasshopper中创建的几何体并在 Rhino 和 Revit 中动态预览,这个脚本将根据 Radius 端口输入的值创建一个球体:
import clr
clr.AddReference('System.Core')
clr.AddReference('RhinoInside.Revit')
clr.AddReference('RevitAPI')
clr.AddReference('RevitAPIUI')

from System import Enum, Action

import rhinoscriptsyntax as rs
import Rhino
import RhinoInside
import Grasshopper
from RhinoInside.Revit import Revit, Convert
from Autodesk.Revit import DB

doc = Revit.ActiveDBDocument

Sphere = Rhino.Geometry.Sphere(Rhino.Geometry.Point3d.Origin, Radius)
Sphere() 方法来自于 Rhino.Geometry 命名空间,此命名空间是 RhinoCommon API 中的一部分。
设置的输出端口参数是 Sphere,把生成的球体赋值给 Sphere 变量以后,Grasshopper 会同时在 Rhino 和 Revit 中显示出预览。(Grasshopper 可以识别到输出参数的几何体并将其显示出来)。可以通过组件上的 Preview 选项切换是否显示预览,输出端口的球体也可以传到后续的组件中去。
现在就可以调整滑块的数值来更改球体的半径了,滑块的数值变化范围设置的大一些,设置的太小在 Revit 和 Rhino 中预览的时候可能很难观察到变化。
烘焙到 Revit 和 Rhino
我们可以在脚本中插入自定义的烘焙函数,可以把这个脚本当做一个可以重复使用的模板,每当需要从 Grsshopper 中创建 Revit 物件时就可以用到这个模板。
因为我们很长时间才需要在 Revit 中执行一次烘焙的操作,因此只有当组件的 Trigger 输入端的值为 True 时才会去执行烘焙函数,这样我们就可以在需要的时候把结果输出到 Revit。
首先,创建一个烘焙函数:
def create_geometry(doc):
    # convert the sphere into Brep
    brep = Sphere.ToBrep()

    # now let's pick the Generic Model category for
    # our baked geometry in Revit
    revit_category = DB.ElementId(DB.BuiltInCategory.OST_GenericModel)

    # Finally we can create a DirectShape using Revit API
    # inside the Revit document and add the sphere brep
    # to the DirectShape
    ds = DB.DirectShape.CreateElement(doc, revit_category)
    # we will use the .ToSolid() extension method to convert
    # Rhino Brep to Revit Solid. Then we will add the solid to
    # the directshape using the .AppendShape() method
    ds.AppendShape([brep.ToSolid()])
函数创建完成后,修改脚本,让它可以监听 trigger 并调用函数。
API 对 Revit 模型的所有更改都需要在 事务(Transaction) 中完成,为了更方便一些,Rhino.Inside.Revit 提供了一个 Revit.EnqueueAction 方法,它将我们编写的方法包裹在一个事务当中,当 Revit 可以对活动的文档进行修改时才调用,事务机制的设计是为了确保任何时候都只有一个 Revit 插件可以对文档进行更改。如果需要创建自己的事务,请参考处理事务
if Trigger:
    Revit.EnqueueAction(
        Action[DB.Document](create_geometry)
    )
完整的范例代码:
import clr
clr.AddReference('System.Core')
clr.AddReference('RhinoInside.Revit')
clr.AddReference('RevitAPI')
clr.AddReference('RevitAPIUI')

from System import Enum, Action

import rhinoscriptsyntax as rs
import Rhino
import RhinoInside
import Grasshopper
from RhinoInside.Revit import Revit, Convert
from Autodesk.Revit import DB

clr.ImportExtensions(Convert.Geometry)
from Autodesk.Revit import DB

doc = Revit.ActiveDBDocument

def create_geometry(doc):
    brep = Sphere.ToBrep()
    revit_category = DB.ElementId(DB.BuiltInCategory.OST_GenericModel)
    ds = DB.DirectShape.CreateElement(doc, revit_category)
    ds.AppendShape([brep.ToSolid()])

Sphere = Rhino.Geometry.Sphere(Rhino.Geometry.Point3d.Origin, Radius)

if Trigger:
    Revit.EnqueueAction(
        Action[DB.Document](create_geometry)
    )
处理事务
要在 Grasshopper python 组件中有效地创建新的事务并处理对模型的更改,请使用下面的模板示例:
# create and start the transaction
with DB.Transaction(doc, '<give a descriptive name to your transaction>') as t:
    t.Start()
    # change Revit document here
    # commit the changes after all changes has been made
    t.Commit()
查看 Revit 版本
在模板中脚本中使用 REVIT_VERSION 全局变量可以查看 Revit 的版本,范例如下:
REVIT_VERSION = Revit.ActiveUIApplication.Application.VersionNumber

if REVIT_VERSION == 2019:
    # do stuff using Revit 2019 API
else:
    # do other stuff
在代码中调用组件
您可以在代码中调用 Grasshopper 的组件,将其当做函数来使用。不需要编写复杂的代码,就可以组成功能更强大的脚本。就像调用库函数一样调用 Grasshopper 组件,可以在完成工作的同时维护更少量的代码。要在代码中使用 Grasshopper 组件首先要使用下面的代码导入组件:
from Rhino.NodeInCode import Components
现在就可以像使用函数一样使用组件了,为了避免命名冲突,这些函数名的前缀是它们的 Grasshopper 插件名。下面的范例演示如何在代码中访问  Add Material 运算器:
Components.NodeInCodeFunctions.RhinoInside_AddMaterial()

# alternatively you can use a finder function to find
# the component by name.
comp = Components.FindComponent("RhinoInside_AddMaterial")
# and call the .Invoke function
comp.Invoke()
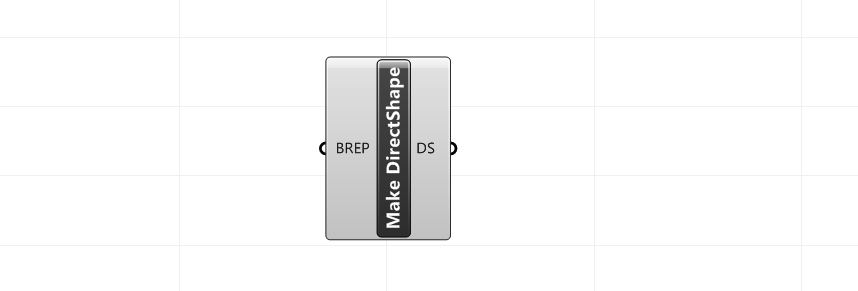
现在结合前面的知识写一个脚本,将一个 Brep 几何体输出到 Revit 并为其赋材质。这个脚本将三个不同的 Grasshopper 组件组合成了一个,请注意,显然有更简单的方法来实现同样的效果,但这只是一个简单的范例,演示如何在脚本中将组件组合在一起。
我们将使用上面创建的模板脚本,在 Grasshopper 中将变量参数修改成这样:
首先找到要使用的组件,如果组件不存在还需要提醒用户。
# AddMaterial component to create a material
add_material = Components.FindComponent("RhinoInside_AddMaterial")
# and AddGeometryDirectShape to create a DirectShape element in Revit
add_geom_directshape = Components.FindComponent("RhinoInside_AddGeometryDirectShape")
如果这些组件不存在就提醒用户:
if not (add_material and add_geom_directshape):
    show_error("One or more of the necessary components are not available as node-in-code")
现在创建脚本的主要逻辑:
# create a color object. modify the logic as you wish
color = System.Drawing.Color.FromName("DeepSkyBlue")

# now create the material using the node-in-code
# note that just like the Grasshopper component, the node-in-code also
# takes 3 inputs in the exact same order (top to bottom)
new_materials = add_material.Invoke("Sky Material", True, color)

# and now use the AddGeometryDirectShape node-in-code to
# create the DirectShape element in Revit
# Notes:
#    - BREP is our input Brep object
#    - new_materials is a list of new materials so we are grabbing the first element
#    - get_category is a function that finds a Revit category from its name
ds_elements = add_geom_directshape.Invoke(
    "Custom DS",
    get_category("Walls"),
    BREP,
    new_materials[0]
    )

# assign the new DirectShape element to output
DS = ds_elements[0]
完整的脚本:
import clr
clr.AddReference('System.Core')
clr.AddReference('RhinoInside.Revit')
clr.AddReference('RevitAPI')
clr.AddReference('RevitAPIUI')

import System
import Rhino
from Grasshopper.Kernel import GH_RuntimeMessageLevel as RML

# bring in the node-in-code handle
from Rhino.NodeInCode import Components

# Revit API
from Autodesk.Revit import DB

from RhinoInside.Revit import Revit

def show_warning(msg):
    ghenv.Component.AddRuntimeMessage(RML.Warning, msg)

def show_error(msg):
    ghenv.Component.AddRuntimeMessage(RML.Error, msg)

def show_remark(msg):
    ghenv.Component.AddRuntimeMessage(RML.Remark, msg)

def get_category(category_name):
    doc = Revit.ActiveDBDocument
    for cat in doc.Settings.Categories:
        if cat.Name == category_name:
            return cat


# AddMaterial component to create a material
add_material = Components.FindComponent("RhinoInside_AddMaterial")
# and AddGeometryDirectShape to create a DirectShape element in Revit
add_geom_directshape = Components.FindComponent("RhinoInside_AddGeometryDirectShape")

if not (add_material and add_geom_directshape):
    show_error("One or more of the necessary components are not available as node-in-code")

if BREP:
    # create a color object. modify the logic as you wish
    color = System.Drawing.Color.FromName("DeepSkyBlue")

    # now create the material using the node-in-code
    # note that just like the Grasshopper component, the node-in-code also
    # takes 3 inputs in the exact same order (top to bottom)
    new_material = add_material.Invoke("Sky Material", True, color)

    # and now use the AddGeometryDirectShape node-in-code to
    # create the DirectShape element in Revit
    # note that BREP is our input Brep object
    ds_elements = add_geom_directshape.Invoke(
        "Custom DS",
        get_category("Walls"),
        BREP,
        new_material[0]
        )

    # assign the new DirectShape element to output
    DS = ds_elements[0]

其他相关内容
这里有一些关于文中用到所有 API 的相关资源的链接: